At one sale I found a beautiful light yellow/off white lace with a beautiful ornate border. The lace was 4 1/4" wide. In my stash was a vintage gold metallic ribbon 2 3/4" wide. The two together were beautiful. When I buy lace, I test it for worthiness. The last thing I want to have happen is to buy something that will fall apart after it is used in some sort of project. The yellow lace was dirty when purchased, but passed the pull test, so it was tossed into the washer and hung to dry. It was only when ironing that it became clear that the lace was mildly dry rotted. Mildly dry rotted means that I can rip it apart, but not easily. It is not yet falling apart, it is just not structurally stable anymore.

Dry rot is common in old lace, I try not to purchase them but when I do, I hate
to throw them out if I can use it in some creative way.
A change in plan was
required. As luck would have it, in my stash were several metallic lace purchased
at various places over the past several years. Two of them were perfect matches
to the metallic ribbon. The top one is 3 1/4 inches wide and the wider one is 7 inches wide

Now for the
pattern. Finding the perfect angel pattern proved to be a task in the "too
hard" category. When I found something I sort of liked, it was not really the idea of what I wanted.
Using my best design skills, a proto type was devised and the pattern adjusted until a final Angel pattern was achieved.
Using my best design skills, a proto type was devised and the pattern adjusted until a final Angel pattern was achieved.
Now for the best
part; sewing the angels together. As always, all of the possible items to be
used are assembled in one place. I have a small fruit box which once held
tangerines that works perfect for this.

The body of the angel is wool felt and is a simple almost gingerbread man looking in design.
First the top of the angel's body was cut out and the face was embroidered in place. Seed beeds were added to the eyes to give it a little sparkle.

Rather than cut the back and then try to match the two together, the cut out front was placed on the uncut wool felt, sewn on and then the back was cut away. To add just a little bulk, a layer of left over felt was used as stuffing.

White was the color I was able to find in the store but was not my color of choice. Wool felt is wonderful to work with. It dyes easy and sews like a dream, unlike its polyester counterpart one finds at the craft stores. Wool Felt is a bit more expensive, but it is so worth the extra money spent.
After completing the first body, It really needed to be dyed so that the body would not be so white against the lace and ribbon of the skirt. Tea and coffee were tested. Tea gave an orange brown hue, coffee gave the wool a nice solid brown or in the case of the angels, once rinsed and dried, a nice neutral off white.

After a coffee bath it was time to make the skirt. This is the first time in a while I have seriously sewn metallic ribbon. After trial and error... lots of error, it made sense to zigzag the edges before the ribbon was cut.

After cutting, the ribbon takes on a mind of its own and there is now way to tame it so that it will be neat when completed. The skirt was traced on to the ribbon using a water soluble pen. A line of zigzag was placed next to the line on both sides. Once the edges were secure, the skirt pieces were cut apart. The two of these triangular pieces sewn together made the under dress and 3 repeats of the lace (approximately 7 inches), one for the front and one for the back, of the smaller of the two metallic laces, gathered, made the outer angel dress. The larger of the two metallic laces did not work so it was set aside of another project some day.
Now for the use of the dry rotted lace, the fun part! First, a piece of waxed paper was placed on the table. Plastic would have worked, it was just what was handy. A piece of silk organza slightly larger than the wing pattern was lightly decoupaged basically to the waxed paper.

Why silk organza? It is what I have a lot of and what ever used needed to be see through so the wings kept an airy appearance.
Next the dry rotted lace was painstakingly trimmed. The ornate bottom was trimmed off of the more airy top part of the lace. The top part of the lace was then decoupaged onto the silk organza.

The silk organza and lace were removed from the waxed paper and flipped lace side down and the application of a layer of lace was added to the other side. the lace-silk organza-lace sandwich was allowed to dry and than was cut out according to the wing pattern. Now the fun began.
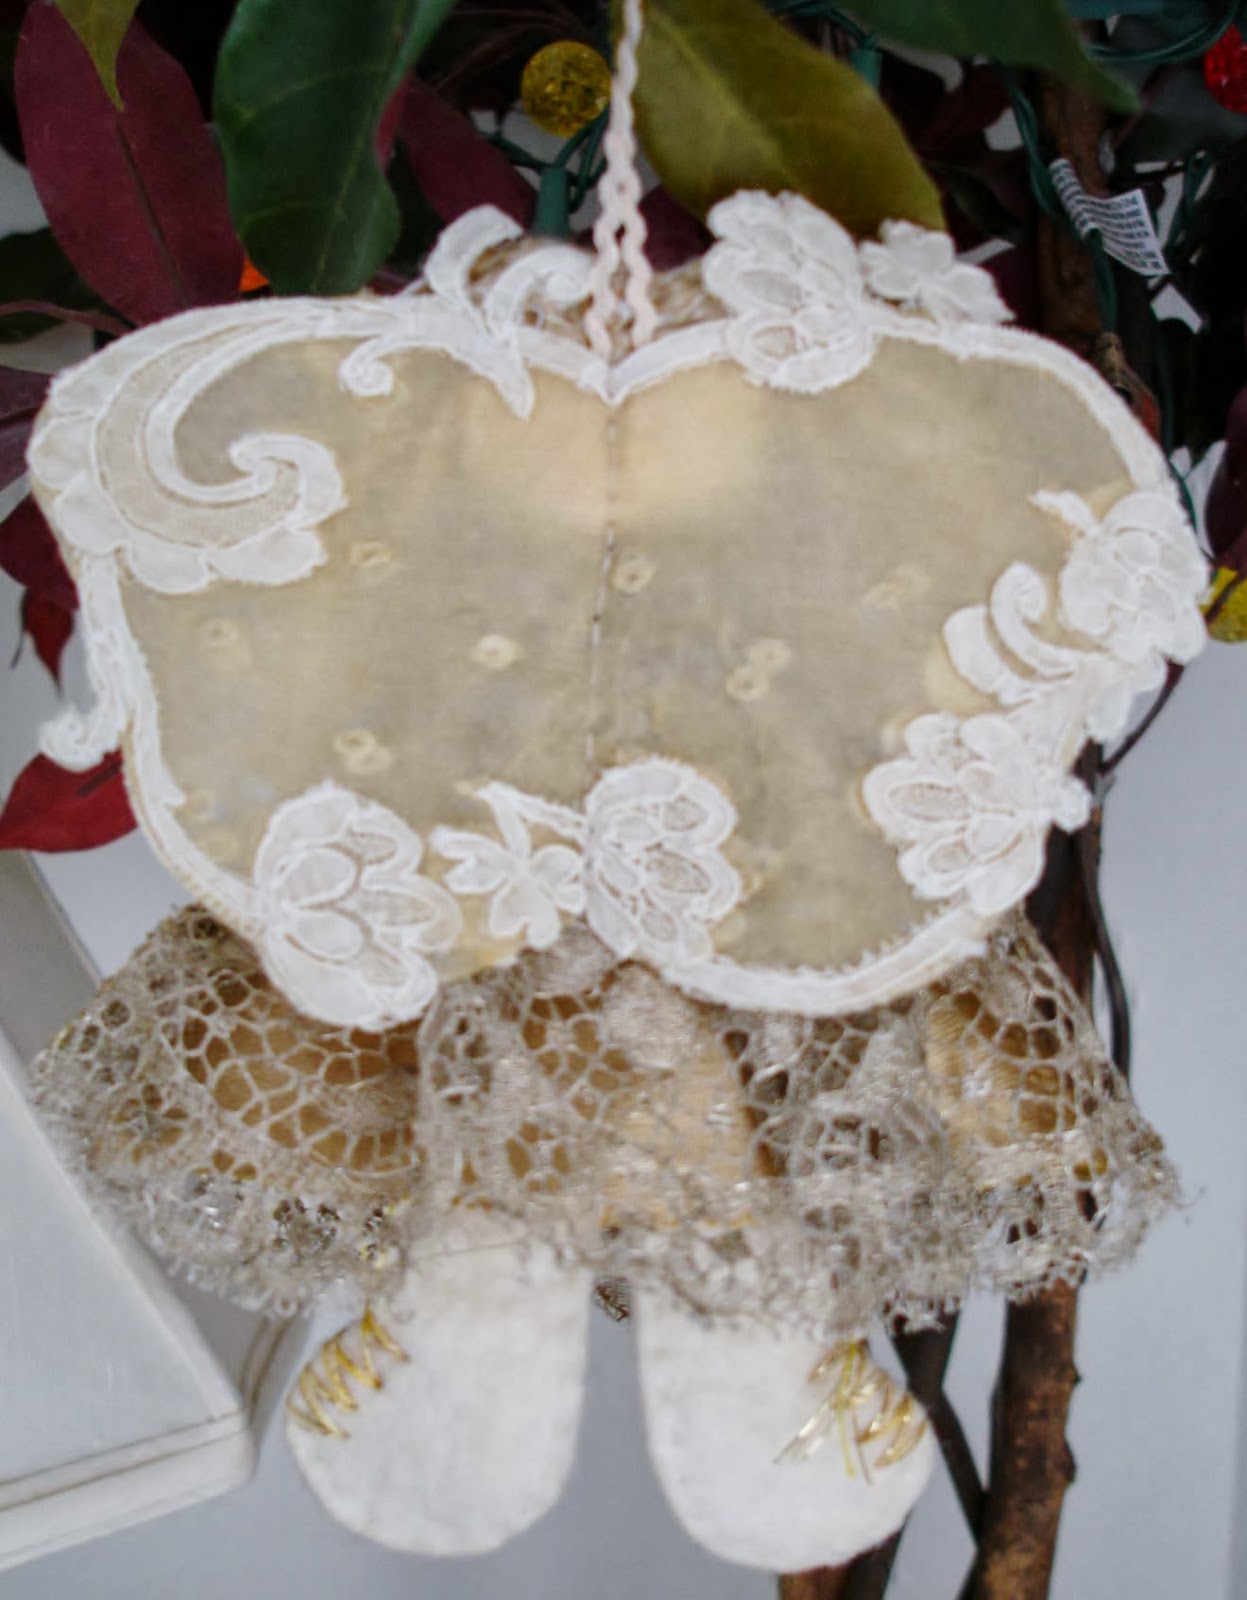
The bottom portion of the lace was trimmed and cut and placed around the outer rim of the wings.


The wings are wonderfully soft and moveable. Best of all they could be sewn on to the angel body since the layer of silk organza hold the stiches even if the layers of lace are dry rotted. The decoupage painting is very thin to allow for the keeping of the look of the original lace.
Hair was added and her arms were moved to hold a couple trinkets. So here she is completed:


What a great use of dry rotted lace! Unfortunately I ran out of dry rotted lace so a substitution was made in the last of the ones that were assembled. Some had a mix of new and old lace, but the one below is just the "new" vintage lace. Working with dry rot was a lot easier than using good lace. The dry rot cut so easily, the good lace did not and took a lot of effort.


After a coffee bath it was time to make the skirt. This is the first time in a while I have seriously sewn metallic ribbon. After trial and error... lots of error, it made sense to zigzag the edges before the ribbon was cut.

After cutting, the ribbon takes on a mind of its own and there is now way to tame it so that it will be neat when completed. The skirt was traced on to the ribbon using a water soluble pen. A line of zigzag was placed next to the line on both sides. Once the edges were secure, the skirt pieces were cut apart. The two of these triangular pieces sewn together made the under dress and 3 repeats of the lace (approximately 7 inches), one for the front and one for the back, of the smaller of the two metallic laces, gathered, made the outer angel dress. The larger of the two metallic laces did not work so it was set aside of another project some day.
Now for the use of the dry rotted lace, the fun part! First, a piece of waxed paper was placed on the table. Plastic would have worked, it was just what was handy. A piece of silk organza slightly larger than the wing pattern was lightly decoupaged basically to the waxed paper.

Why silk organza? It is what I have a lot of and what ever used needed to be see through so the wings kept an airy appearance.
Next the dry rotted lace was painstakingly trimmed. The ornate bottom was trimmed off of the more airy top part of the lace. The top part of the lace was then decoupaged onto the silk organza.

The silk organza and lace were removed from the waxed paper and flipped lace side down and the application of a layer of lace was added to the other side. the lace-silk organza-lace sandwich was allowed to dry and than was cut out according to the wing pattern. Now the fun began.
The bottom portion of the lace was trimmed and cut and placed around the outer rim of the wings.


The wings are wonderfully soft and moveable. Best of all they could be sewn on to the angel body since the layer of silk organza hold the stiches even if the layers of lace are dry rotted. The decoupage painting is very thin to allow for the keeping of the look of the original lace.
Hair was added and her arms were moved to hold a couple trinkets. So here she is completed:


What a great use of dry rotted lace! Unfortunately I ran out of dry rotted lace so a substitution was made in the last of the ones that were assembled. Some had a mix of new and old lace, but the one below is just the "new" vintage lace. Working with dry rot was a lot easier than using good lace. The dry rot cut so easily, the good lace did not and took a lot of effort.