Wednesday, January 29, 2014

A small sewing bag

At my French patchwork club this last week, we made small zipper bags. We were asked to bring fabric for the lining and outside of the bag, a batting of some sort and a zipper (not metal) longer than the shorter side of the rectangle of fabric we would be starting with. I could not decide which fabric I wanted to use so I brought along a small assortment. At the club it became clear that I make my bag the way I wanted it I would need to take the idea home with me and figure out exactly what I wanted and with what materials.

First the size - rectangle
 
Given that information, helpful, I know, I had to figure out what finished size I wanted. I made a paper model so that I would get the end result I desired. I ended up with a length of 13" and a width of 10".  Size includes a 1/2" seam allowance.
 
As usual all of the prospective materials were rounded up.
The fabric I wanted to use for the outside of the bag is a directional linen. I have 3 color choices of the same linen fabric. I fell in love with it and over the past year I have found it three times, each time in a different color combination. The fabric is Yuwa Live Life Collection Premium and is made in Japan. I own each of the three in 1/2 meter cuts. The lining is a cotton fabric covered with French writing. It is  "Paris Tea" by Holly Holderman for Lakehousedrygoods.com number LH10048. The laces are not vintage, I bought them last year and they are cotton.
 
Due to the directional linen, to make the bag work, I would have to seam the center bottom of the bag that way, the writing would be right side up on both sides of the bag.
 
Assembly was relatively easy. The backing, batting and top were spray adhesived together. The zipper was sewn on to each end of the shorter length. The top of the zipper flush with the side (length) seam, and the long end of the zipper allowed to hang off the end.
Top stitching was done to hold the lining and seam allowance in place and not get in the way of the zipper.. 
 
Before sewing the side seams, the lace next to the zip opening was added. I like to use my Bernina #10 Edge stitch foot (love this foot). The needle position was moved to one side and a small zigzag was selected. The middle guide of the foot while sewing rides right up next to the fabric and the lace was placed up against the guide as sewing was done. What comes out is beautifully applied lace right up against the edge of the fabric.
See?
 
 The bag was then folded so that the zipper was centered as shown.  The little pull tabs added, centered on the zipper and the side seams sewn.  I used a 3 1/2 inch piece of lace folded in half for the tab.
 
To get the box effect, a 1 1/2" triangle was sewn in each corner. The Triangles were trimmed. All the inside seams were finished with a zigzag stitch.

From the outside of the bag:
 
A peak into the inside:
 
Finished bag size: Height - 3", Width - 3 1/2" and Length - 5 1/2".


I am pleased with the results and I am glad I took the time to get the fabric placement correct.
I’ll be linking up with this great party:
 
Fabulously Creative Friday at Jennifer Rizzo

Saturday, January 25, 2014

Grow Your Blog

Welcome to my blog and the Grow Your Blog event. To see who is participating click here.

 My name is Jean and I live in France.
 
When I tell people I live in France, they assume I live in Paris. Far from it, I live near the borders of Germany and Luxembourg. By train it is about 1 hour and 20 minutes to Paris on the high speed train otherwise known as the TGV.

Life is not bad here. Around Christmas my adopted town looks like this:
 
And in summer, more like this:
 
Living in this little corner of France has really opened the opportunity to become a serious collector of sorts. I now find I am addicted to collecting moldy smelling old lace, vintage fabric and threads of all sorts. If I am not collecting vintage, I am collecting modern fabrics manufactured by good hearted companies producing an end product with less than correct French grammar.


I am not satisfied with collecting. I want to use that Fabric with bad grammar.
http://frenchoddities.blogspot.fr/2013/03/un-sac-de-mauvais-francais.html

Not satisfied with just collecting lace, threads and fabric, when it comes to lace, I want to know how it was made. 
Battenburg Lace

 
Thanks for stopping by, I know you have at almost 600 other blogs to look at. Before you go, register to win one of my latest project; Jewelry for your scissors.  Scissors not included, you have to supply your own naked pair of scissors.

It will be given away to some lucky person who leaves a comment below. Drawing is supposed to be on 15 February, but...hehe... I will be in Paris with, most likely not very reliable internet access. Ah C'est la Vie! Drawing will be on the 17th of February. Good luck!

Thursday, January 16, 2014

Au Canada

Last year a friend gave me quite a quantity of linen fabric (thanks Teena). I have now, to date, made 2 shirts using this fabric. It is a little challenging to work with since it is linen plaid that requires a whole lot of matching.


I have auto delivery for Louis Cutting's patterns which means that patterns magically appear at my doorstep every so often. I have quite the collection of them now. Since I had this wonderful linen fabric, I perusing the patterns, deciding on the top from "Relax a Little".
 
From experience I know that for a top like this one, I need to add an inch to the length so that the top falls at a more flattering part of my body.

Making the shirt went well, except for the sewing of the sleeve area to the wrong side, but I digress... Shirt was finished awaiting buttons, I tried it on.
 
It was... it was....well, boring. I tried out on it all of the usual suspects for buttons, mother of pearl, brown, wood, nothing worked and certainly, nothing made the shirt pop. This was supposed to be an simple top, something for this summer. I put it away where it hung in my sewing room for a couple of days.

Last year I found this old glass milk jug with attached lid with raised lettering "La Lorraine" at a second hand store in Alsace. It was love at first site and the price made it a bargain. I washed the inside and over time have started filling it with buttons. As I find them in my sewing space I pop them into the jug so that they are all in one place and easier to find. While cleaning my sewing area, I found the perfect buttons.
 
Last year I was at a flea market in a small town nearby and there was a woman selling all sorts of brass buttons and lots of fun lace bits. I bought 3 sets of buttons from her and a stack of pieces of lace and embroidered pieces. As she tallied everything up, she grabbed a bag of brass buttons, one that I had passed over from buying, "with my complements" she said as she tossed them in with the rest of my purchases. Later I took them out , looking at them made me smile. I decided I needed to find someone from Canada to give them to.
 
-Just a little brief history -
In 1959, France under the presidency of Charles de Gaulle, withdrew its Mediterranean Fleet from NATO command. Over the next few years, NATO military aircraft were removed from France so that by 1967, France had taken back control of all air force bases.
 
Here is a map from Wikipedia showing the locations of the NATO Airbases in France prior to 1967:

Notice the number of them near the Luxembourg and German borders. So it should not  be a surprise that old military artifacts show up quite often at flea markets in my area of France.
 
-Now back to sewing-
You may have guessed by now that what I had been given was a set of Canadian heavy jacket brass military buttons. Dating them would place them as at least made in 1967, most likely earlier. They are in beautiful shape.

Buttons alone would not the shirt make. it needed, it needed....LACE!
 
YIPPY!
 
Digging through my stash I found the perfect lace edging to use. Heavy to match the buttons, but pretty to complement the shirt.
 
The lace was a breeze to sew on
 
Finishing it off are buttons to look almost like amulets on the shoulders. 
 
Love it!


Sunday, January 12, 2014

bijoux pour mon sac

A couple of years ago I ran across a bag of wooden spools, the kind that would be used for thread. There were about 100 of them in the bag, in all sizes, from very small to a normal sized spool for sewing thread. They are modern not vintage and appeared to be made specially for crafting. Over the past few years, a couple of them have been used to hold lace or rickrack, but the bulk of them are sitting unused. I saw a pin cushion pattern once that used some of the medium sized ones. It was cute but somehow I never got around to making it.

Some months ago it came to me what to do with the little ones., I had acquired more of them on a trip to the States. I would make something pretty, a little bijoux pour mon sac. Putting an idea together was fast and easy.

 
Doing all of those projects with dry rotted lace has really helped in the thinking about the use of Decopatch ( Mod Podge ). As always first everything one might need was assembled in a box.
Not much required for this project. little spools, jewelry making supplies, beads, 12 wt thread, Decopatch and a something to wind thread on. That is the little toothpick sort of thingy at the bottom of the picture. They are used for appetizers here.

First things first, the spools need to be wound with thread. The larger size threads work better for this part, experience speaks here. at a minimum 30 wt thread. Anything smaller than that is hard to neatly wind.
Start by putting a little of the Decopatch on the spool.

Run the end of the thread through the Decopatch to get it sticky, lay the thread across the bobbin length wise and then start winding catching the first wind over the thread end.

Continue to wind 3 or 4 more round and cut the thread tail short. The hump it leaves is distracting to the final appearance. 
Continue to wind the entire length of the bobbin. paint a little of the Decopatch on the thread and with your fingers rub it in. Cut the thread end at the bottom of the spool and Decopatch the end so that the end is flush with the other wrapped thread windings. There is no need to go back up the spool for a second layer of thread, one layer looks just fine. Let it dry. That's it!

Now the fun begins! A couple of beads and jewelry supplies;

Make a thread matching tassel for the end loop, the wooden stick is great for making tassels:

A little work and soon you end up with this:


Or why not a little jewelry too?


Finally, how about a little jewelry for my scissors?


Friday, December 27, 2013

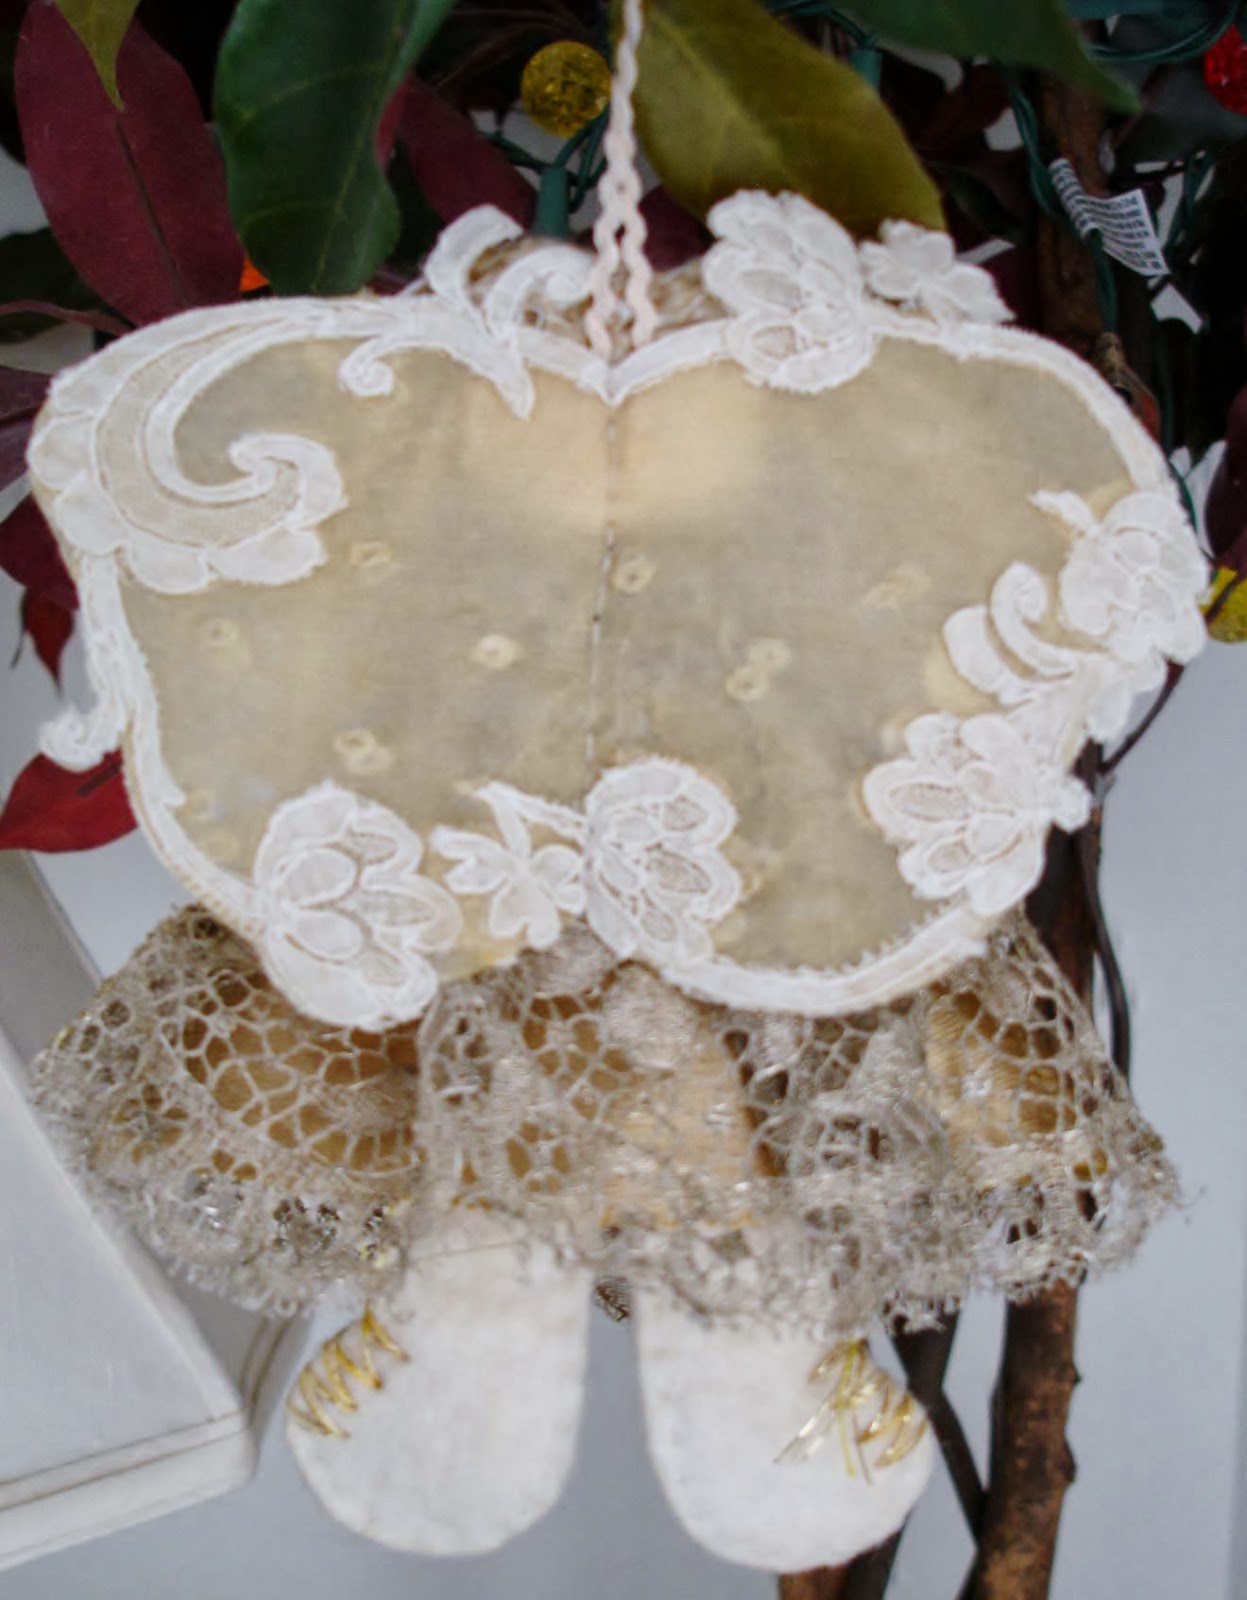
A Christmas Angel

Every year I participate in a Christmas Ornament Exchange with one of the Yahoo groups to which I belong. Last year I made hearts out of an old Zweigart table cloth, found at a yard sale in Ludwigsburg Germany. A few years ago the "French"Kitties were made. In the past few years, the usage of repurposed materials were stressed to make the ornament that much more special. This year was no different.

 This year was the year of the angel. It was the design that kept coming up as ideas were sought as to what to make this year. At various yard sales and second hand stores visited this last year, items have been found that would be perfect for the angel.

At one sale I found a beautiful light yellow/off white lace with a beautiful ornate border. The lace was 4 1/4" wide. In my stash was a vintage gold metallic ribbon 2 3/4" wide. The two together were beautiful. When I buy lace, I test it for worthiness. The last thing I want to have happen is to buy something that will fall apart after it is used in some sort of project. The yellow lace was dirty when purchased, but passed the pull test, so it was tossed into the washer and hung to dry. It was only when ironing that it became clear that the lace was mildly dry rotted. Mildly dry rotted means that I can rip it apart, but not easily. It is not yet falling apart, it is just not structurally stable anymore.

Dry rot is common in old lace, I try not to purchase them but when I do, I hate to throw them out if I can use it in some creative way.

A change in plan was required. As luck would have it, in my stash were several metallic lace purchased at various places over the past several years. Two of them were perfect matches to the metallic ribbon. The top one is 3 1/4 inches wide and the wider one is 7 inches wide

Now for the pattern. Finding the perfect angel pattern proved to be a task in the "too hard" category. When I found something I sort of liked, it was not really the idea of what I wanted.

Using my best design skills, a proto type was devised and the pattern adjusted until a final Angel pattern was achieved.

Now for the best part; sewing the angels together. As always, all of the possible items to be used are assembled in one place. I have a small fruit box which once held tangerines that works perfect for this.
 
The body of the angel is wool felt and is a simple almost gingerbread man looking in design. First the top of the angel's body was cut out and the face was embroidered in place. Seed beeds were added to the eyes to give it a little sparkle.

Rather than cut the back and then try to match the two together, the cut out front was placed on the uncut wool felt, sewn on and then the back was cut away. To add just a little bulk, a layer of left over felt was used as stuffing.

White was the color I was able to find in the store but was not my color of choice. Wool felt is wonderful to work with. It dyes easy and sews like a dream, unlike its polyester counterpart one finds at the craft stores. Wool Felt is a bit more expensive, but it is so worth the extra money spent.
 
After completing the first body, It really needed to be dyed so that the body would not be so white against the lace and ribbon of the skirt. Tea and coffee were tested. Tea gave an orange brown hue, coffee gave the wool a nice solid brown or in the case of the angels, once rinsed and dried, a nice neutral off white.


After a coffee bath it was time to make the skirt. This is the first time in a while I have seriously sewn metallic ribbon. After trial and error... lots of error, it made sense to zigzag the edges  before the ribbon was cut.

After cutting, the ribbon takes on a mind of its own and there is now way to tame it so that it will be neat when completed. The skirt was traced on to the ribbon using a water soluble pen. A line of zigzag was placed next to the line on both sides. Once the edges were secure, the skirt pieces were cut apart. The two of these triangular pieces sewn together made the under dress and 3 repeats of the lace (approximately 7 inches), one for the front and one for the back, of the smaller of the two metallic laces, gathered, made the outer angel dress. The larger of the two metallic laces did not work so it was set aside of another project some day.

Now for the use of the dry rotted lace, the fun part! First, a piece of waxed paper was placed on the table. Plastic would have worked, it was just what was handy. A piece of silk organza slightly larger than the wing pattern was lightly decoupaged basically to the waxed paper.

 
Why silk organza? It is what I have a lot of and what ever used needed to be see through so the wings kept an airy appearance.

Next the dry rotted lace was painstakingly trimmed. The ornate bottom was trimmed off of the more airy top part of the lace. The top part of the lace was then decoupaged onto the silk organza.

The silk organza and lace were removed from the waxed paper and flipped lace side down and the application of a layer of lace was added to the other side. the lace-silk organza-lace sandwich was allowed to dry and than was cut out according to the wing pattern. Now the fun began.

The bottom portion of the lace was trimmed and cut and placed around the outer rim of the wings.


The wings are wonderfully soft and moveable. Best of all they could be sewn on to the angel body since the layer of silk organza hold the stiches even if the layers of lace are dry rotted. The decoupage painting is very thin to allow for the keeping of the look of the original lace. 

Hair was added and her arms were moved to hold a couple trinkets.  So here she is completed:


What a great use of dry rotted lace! Unfortunately I ran out of dry rotted lace so a substitution was made in the last of the ones that were assembled. Some had a mix of new and old lace, but the one below is just the "new" vintage lace. Working with dry rot was a lot easier than using good lace. The dry rot cut so easily, the good lace did not and took a lot of effort.


Wednesday, October 30, 2013

Tee-shirt Transformation

This summer there was a sewing challenge I participated in. The challenge was to take a cotton jersey shirt in any style and we were to re-style it anyway we wanted to. As long as it was out of tee-shirt fabric, it qualified. We could even make one new if we wanted to, what we did to it after that was the challenge.

In the spare bedroom I have a small pile of clothing that need to go to the equivalent of goodwill here in France.
In that stack, left by someone who visited me well over a year ago, was a Chico blue turtle neck sweater in a size XL.
It had no stains and was in very good condition. It was not really my color, I do not look good in that shade of blue, but it was perfect for the challenge.

On line, I had taken, or better put, watched the Craftsy class called Hand-Embellishing Knit Fabric:Stenciling, Appliqué, Beading and Embroidery. The class is taught by Natalie Chanin of Alabama Chanin. The technique fascinates me. I bought her stitch books, all 3 of them, and read them cover to cover. I had a good giggle over the recipes. Some of the ingredients are difficult to obtain in France. My french friends found some of the recipes interesting as well. On my list soon is to try a couple recipes on them.

I pulled out some grey jersey I had in my stash and started to play making a small sample of the techniques taught in the Craftsy class.
Then there was the announcement for the challenge at the beginning of summer. Always up for doing something fun and creative, I joined.

I decided to make the Corset from book 1. 

In book 1, "Alabama Stitch Book: Projects and Stories Celebrating Hand-Sewing, Quilting and Embroidery for Contemporary Sustainable Style", re-use is stressed and the pattern and basic directions for taking an old knit tee-shirt and making something new with it are given.

In book 2, "Alabama Studio Style: More Projects, Recipes & Stories Celebrating Sustainable Fashion & Living", an interesting technique for appliqué is given where the design is enlarged so that when it is appliquéd into place, a wrinkled texture is obtained.

The blue shirt, not really being my favorite shade of blue needed something to make the appliqué stand out. I wanted to use the entire shirt (Where else would I find the same weight and texture fabric to go with the shirt?) 

I decided to dye some of the shirt so that the appliqué could be made darker. In my stash I have a number of procion dyes in various colors and one of them was navy blue. Perfect for the look I was trying to obtain.

Everything that was not used for the main pieces of the corset, all edge bindings and appliqué were dyed a darkish shade of navy blue. The entire shirt is sewn by hand using the recommended thread, Craft and Button 74% polyester, 26% cotton and uses the method spelled out in the books and in the Craftsy class. Grey thread was used for construction and beading rather than the blue thread since the blue thread did not coordinate with the blue of the shirt. 

Here is the final completed project:
Front
Back
Just a word about the sizing. The corset is meant to be close fit and low cut at the bust. I added an inch at the bust so that it was a higher cut and made a size medium. I normally wear a size small and now that the top is completed, it is still a close fit.